Choosing the suitable role
Before we dive into API key creation, let us explain roles
Roles are needed to differentiate the rights to use various functionality for users or API keys. In this guide we are interested in the roles for API keys.
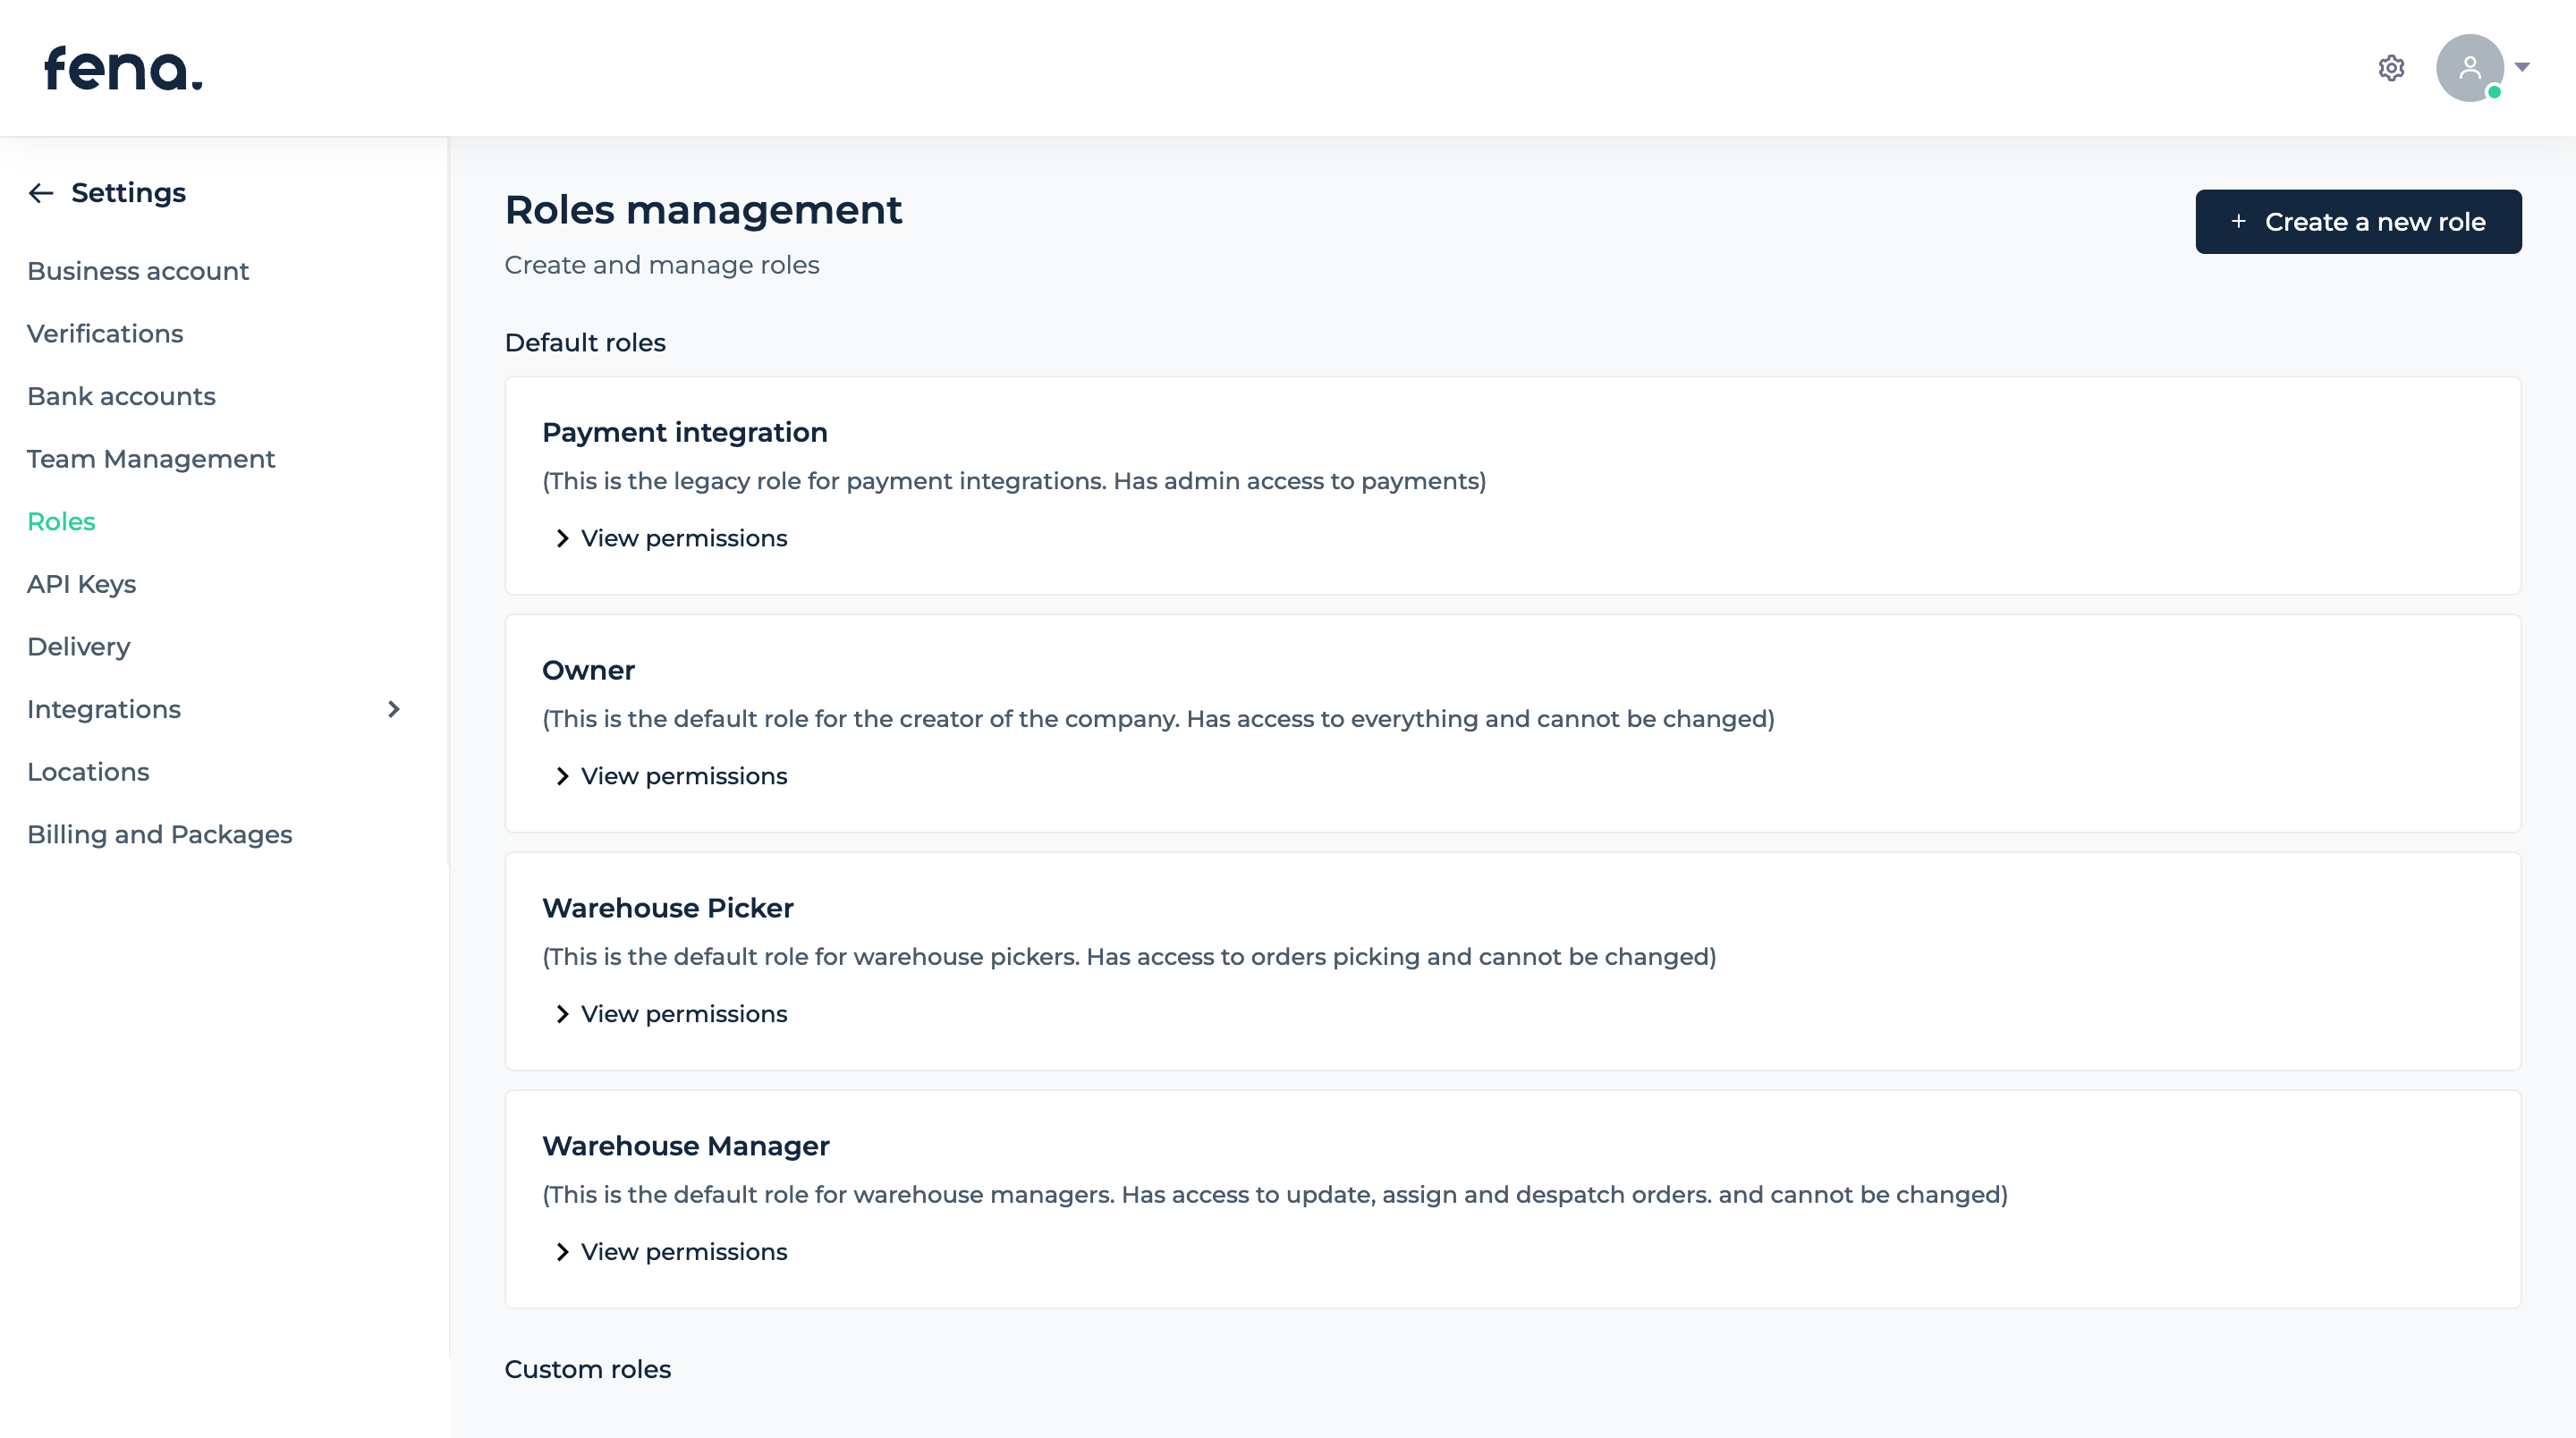
First, let's move to the organisation settings menu (cog icon in the top right corner) and go to the section called “Roles”

As you can see, there are some default roles here, including a role called “Payment Integration”, which is great for creating API keys that are necessary to interact with the API. The Payment Integration role gives the API Key full access to manage your payments within your organisation's Toolkit account. If this role suits you, then you can skip "Creating custom role" guide
Creating custom role
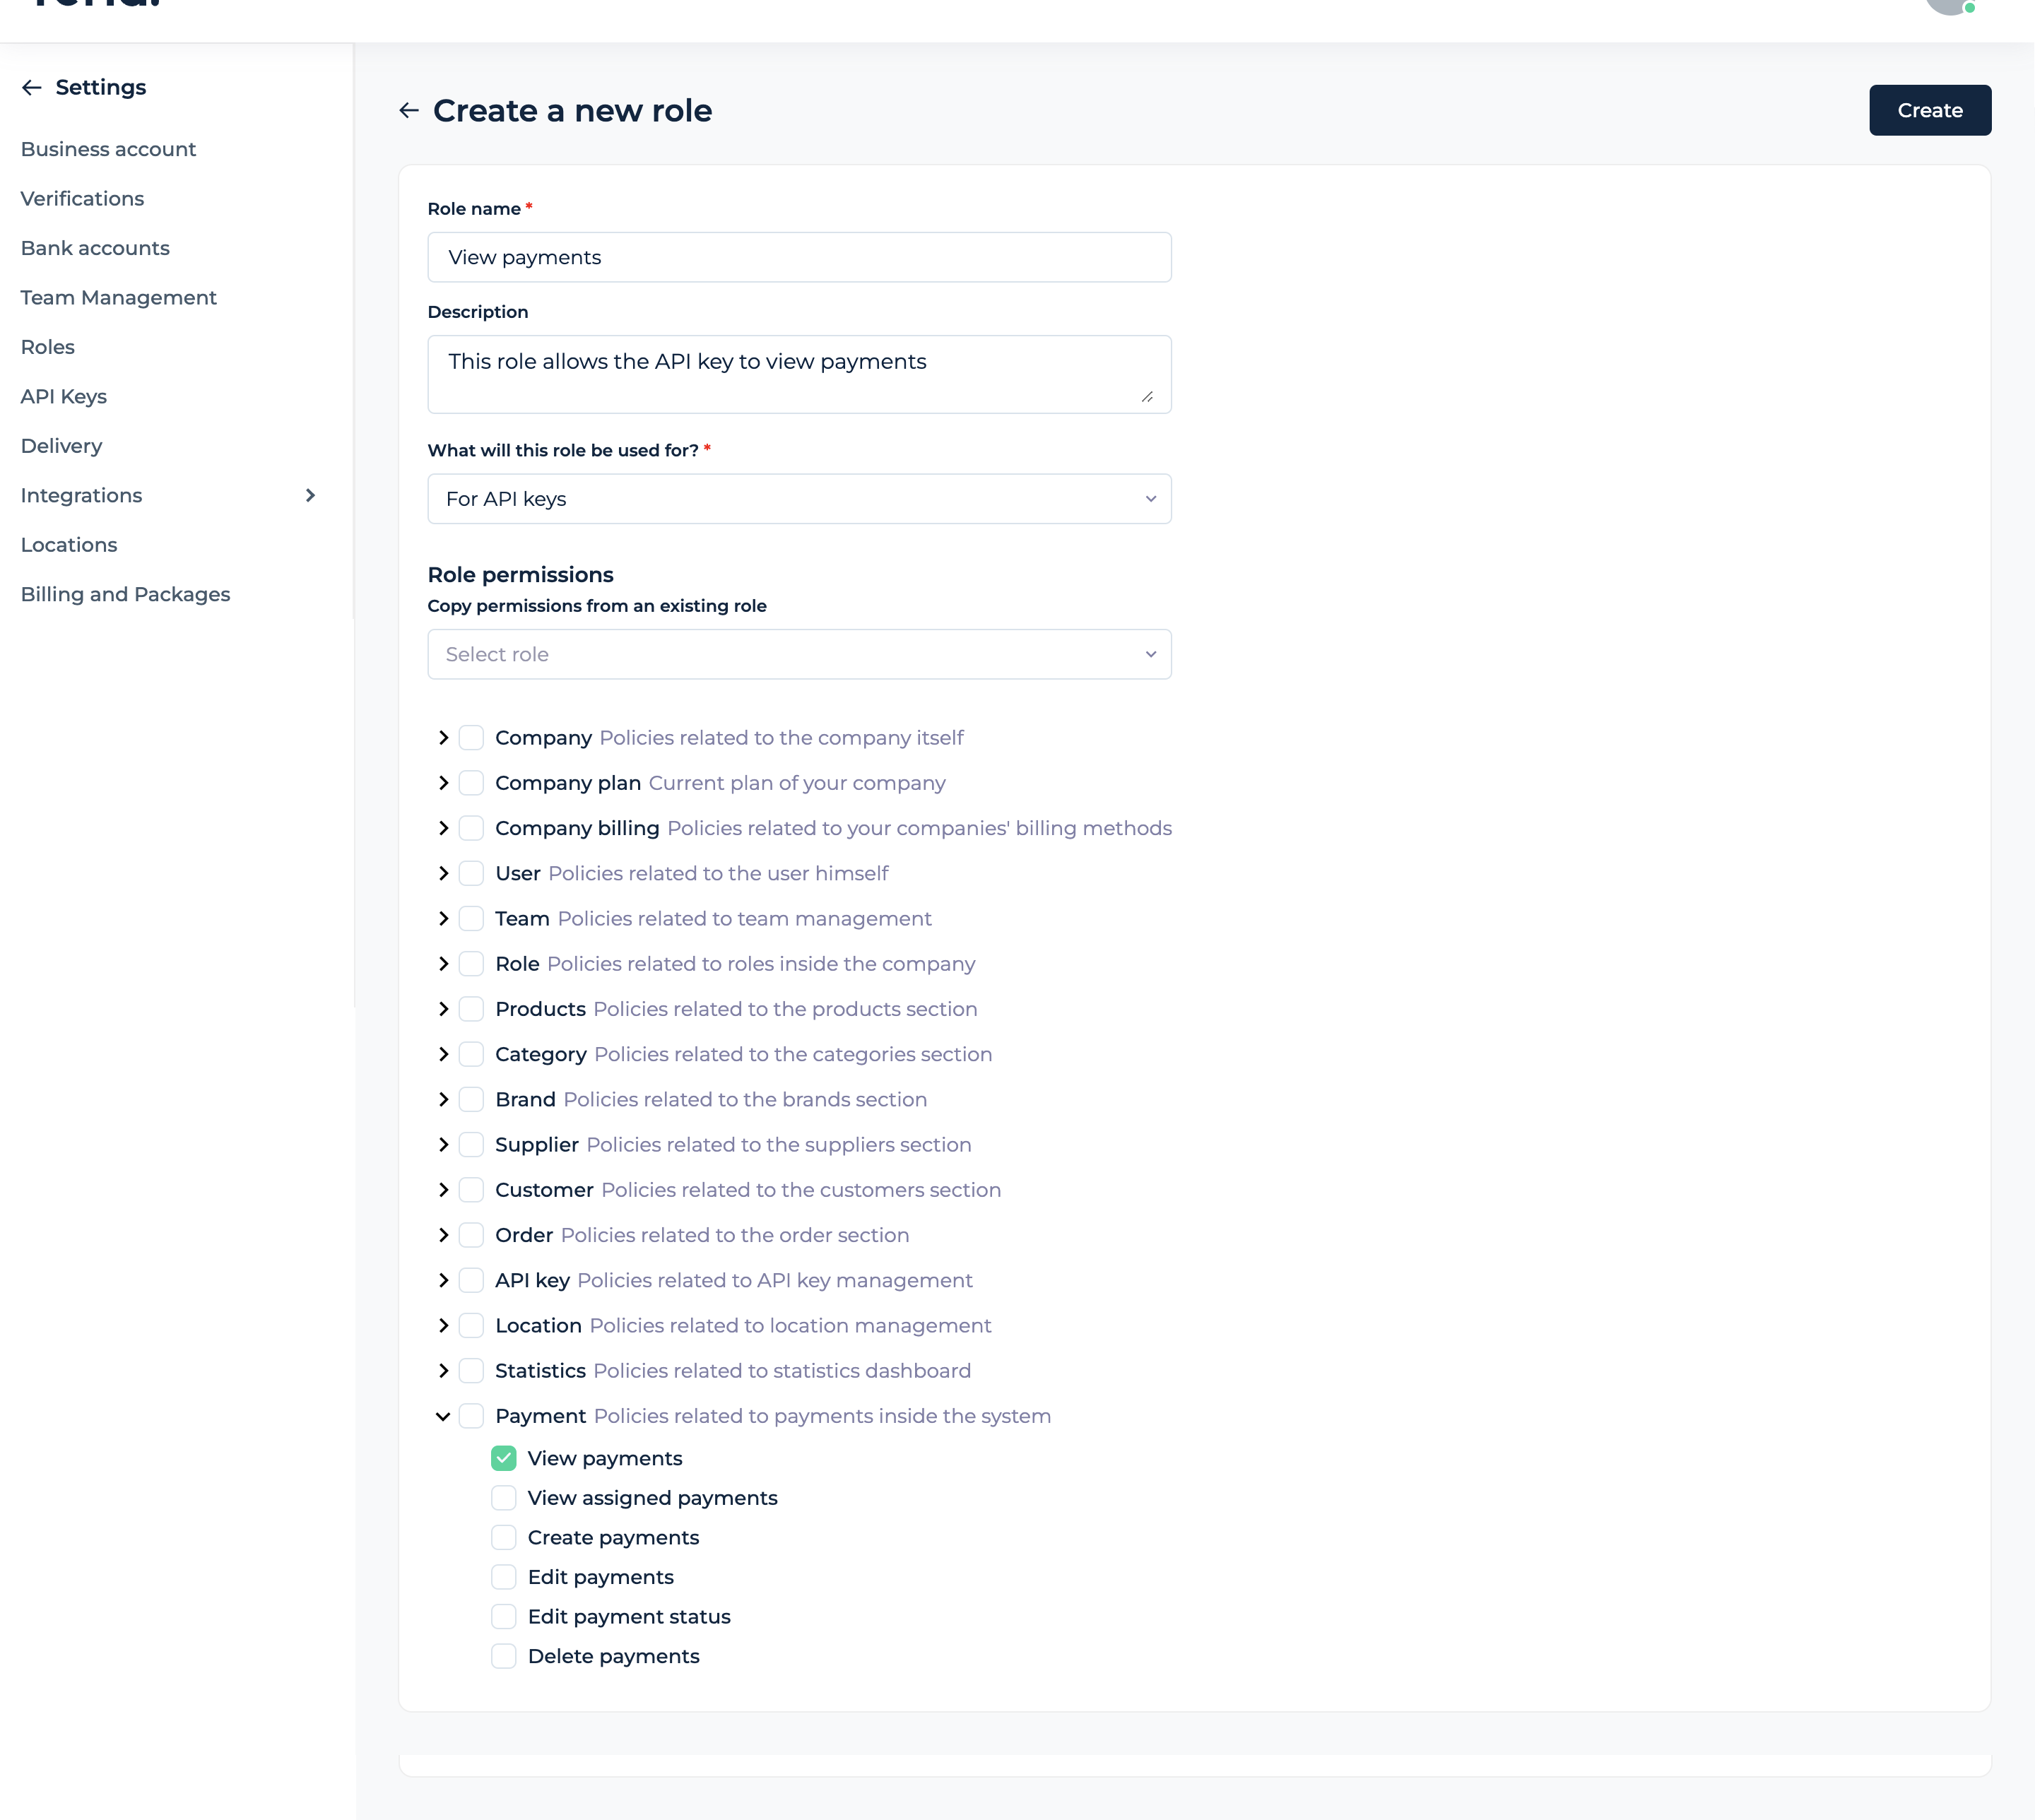
If none of the default roles offered suits you, you can create your own. To do this, click the "Create" button on the roles page. Here you can find a form for creating roles. Below you can find a description of the form fields.

- Role name - the field is free to type. Designed so that you can distinguish different roles from each other.
- Description - optional field. Here you can add a more detailed description of the role, for example, its purpose
- What will this role be used for? - Determines which entity this role is intended for. Here you can choose one of the 3 proposed options:
- Teammates - this role can be assigned to any member of your organisation.
- API key - this role can only be assigned to an API key.
- For anything - this role can be assigned to both the API key and the teammate
- Role permissions - In this section, you can specify what specific functionality the entity to which this role has been assigned will have access to.